Tools You’ll Need
Are you ready to take on that ancient faucet? How thrilling! Let’s kick things off by rounding up the necessary tools to tackle this project with ease. Start by grabbing a set of adjustable wrenches – your loyal companions for this endeavor. Next, procure a pair of tongue and groove pliers to assist in reaching those tricky spots. Remember to have your trusty bucket at the ready to catch any pesky drips, along with a rag for tidying up any potential messes.
Now, let’s delve into the significance of having the correct tools for the task at hand. As Thomas Huxley once pondered, “The rung of a ladder was never meant to rest upon, but only to hold a man’s foot long enough to enable him to put the other somewhat higher.” In essence, having the appropriate tools not only simplifies the job but also ensures it is completed correctly on the initial attempt. Therefore, gather your arsenal of tools, equip yourself with unwavering resolve, and let’s revolutionize that faucet replacement like true professionals.
Preparation Before Starting
You’ve made the bold choice to embark on the journey of upgrading your faucet kudos to you for venturing into the realm of DIY home improvement! But before you go twisting and turning like a frantic plumber, let’s ensure that you are fully equipped and prepared to navigate this project seamlessly.
First and foremost, check that your toolkit is stocked with all the necessary tools a trusty set of adjustable wrenches, a handy bucket for any water mishaps (we definitely don’t want a mini flood situation), some elusive Teflon tape for those stubborn connections, and perhaps even a reliable flashlight if your plumbing nook resembles a crypt. Scan your surroundings; is there a pet or child determined to investigate every move you make? It might be wise to have some distraction tactics up your sleeve. Remember Tim Allen’s profound words, “I think a flashlight is something you could find in a dark place.” So grab that light source and prepare to illuminate this endeavor.
Now that you’ve organized your tools and strategized how to keep curious companions at bay, take a moment to mentally brace yourself for the challenge ahead. Embrace your inner Bob Vila and embrace the essence of DIY prowess. As Audrey Hepburn famously said, “Nothing is impossible; the word itself says ‘I’m possible’!” So inhale deeply, brew yourself some liquid ambition (aka coffee), and dive headfirst into this faucet escapade with eagerness and determination.
Removing the Old Faucet
Removing the ancient faucet may appear as a formidable challenge, yet fret not, dear comrades of the DIY realm! Armed with a mere handful of tools and a dash of unwavering resolve, you shall swiftly extract that archaic contraption. Recall the words of the illustrious inventor Thomas Edison: “There is no substitute for hard work,” and believe me when I say, extracting an aged faucet is no trivial feat. But do not despair, for you possess the arsenal of knowledge and a trusty wrench!
Initially, shut off the water supply by manipulating the valves beneath the sink – this step is imperative unless you desire to transform your kitchen into an impromptu aquatic playground. As the flow of water ceases, inhale deeply and mentally brace yourself for the impending skirmish. Now, clutch your flashlight and peer into the enigmatic void beneath the sink where the antiquated faucet lurks. It is time to loosen the nuts and bolts securing it in place, summoning forth your hidden reserves of superhuman vigor. Remember always what sage Maya Angelou imparted: “I can be changed by what happens to me. But I refuse to be reduced by it.” Let us plunge headfirst into battle and emerge victorious over that recalcitrant faucet!
Assembling the New Faucet
Prepare yourself for the enigmatic journey of assembling your gleaming new faucet! Spread out all the components like fragments of a perplexing puzzle waiting to be deciphered. Keep in mind, unraveling how all these pieces interlock is akin to cracking the cryptic code of contemporary plumbing – a noble pursuit indeed.
As you commence putting things together, summon your inner DIY champion. Recall, as the illustrious Tim Allen once proclaimed, “I can mend anything in my abode with merely a roll of duct tape.” Well, perhaps not everything, but a faucet assembly? Without question. So embrace the challenge, tighten those screws, and presto you’re one stride closer to a gracefully functioning kitchen or bathroom. Give yourself a well-deserved pat on the back you are now officially a faucet assembly sorcerer!
Attaching the New Faucet
Armed with the shiny new faucet in hand, it’s time to embark on the mysterious journey of attaching it to your sink and restoring your kitchen or bathroom to its former splendor. No pressure, but this is where the true enchantment unfolds. Envision yourself as a masterful faucet-fixer, poised to tackle this challenge with the grace of a seasoned DIY aficionado.
Before diving in headfirst, ensure that you adhere meticulously to the manufacturer’s guidelines. This is not the moment for reckless defiance; instead, embrace Montaigne’s wisdom: “The greatest thing in the world is knowing how to belong to oneself.” So let us yield ourselves entirely to these instructions and affix this new faucet securely, ensuring a snug and steadfast fit. Consider it akin to solving a perplexing puzzle albeit one involving water.
Connecting the Water Supply Lines
After successfully installing your shiny new faucet, the next puzzling task is connecting the elusive water supply lines. This enigmatic process is where the transformation occurs, turning your mere aesthetic fixture into a fully functional masterpiece. Remember, neglecting these essential supply lines will render your extravagant faucet nothing more than an ostentatious ornament!
The secret lies in achieving impeccable precision. It’s imperative to ensure that these water supply lines are fastened snugly and securely, striking a delicate balance akin to Goldilocks’ quest for perfection – not too loose, not too tight. As the iconic plumber Mario once cryptically remarked, “It’s-a me, Mario! Beware of overtightening those supply lines or you’ll be swimming in leaks!” Profound advice from a seasoned pipe expert. So take heed; proceed with caution and meticulous attention to detail as you align everything flawlessly. Soon enough, you’ll be serenaded by the harmonious melody of water coursing through your newly installed faucet like a symphony of flawless plumbing artistry.”
Checking for Leaks
Congratulations on successfully installing your new faucet! You’re a DIY superstar, no doubt about it. But hold off on the celebration just yet – there’s one last step that’s crucial: checking for leaks. Because as the wise plumber saying goes, “A leak left unchecked will make your day bleak.”
Now, grab a flashlight and get down on your knees (yoga pose optional) to inspect all the connections closely. Remember the words of Albert Schweitzer: “Success is not the key to happiness. Happiness is the key to success.” Tighten any loose fittings and turn on the water slowly. Stay alert for any sneaky drips or hissing sounds – they’re sure signs that something isn’t right. And keep in mind what Benjamin Franklin said: “A little drip can sink a great ship.”
If you do happen to spot a leak, don’t panic. With some adjustments and determination, you’ll have that faucet leak-free in no time at all.
Cleaning Up
With the new faucet installed and leaks hopefully avoided (fingers crossed tightly!), it’s now time to confront the aftermath – cleaning up. Grab that trusty sponge and some soapy water because we’re about to transform that sink into a shining diamond amidst all the roughness.
Begin by perplexing yourself with wiping down the area surrounding the faucet, ensuring any lingering grime or fingerprints are banished. Remember to lavish your new faucet with a thorough polish – it’s the main attraction now, after all. Once everything bursts forth in sparkling cleanliness, take a moment to step back, marvel at your accomplishment, and give yourself a well-deserved pat on the back. As Maya Angelou so enigmatically stated, “Nothing will work unless you do,” and oh my goodness did you ever put in some serious work today!
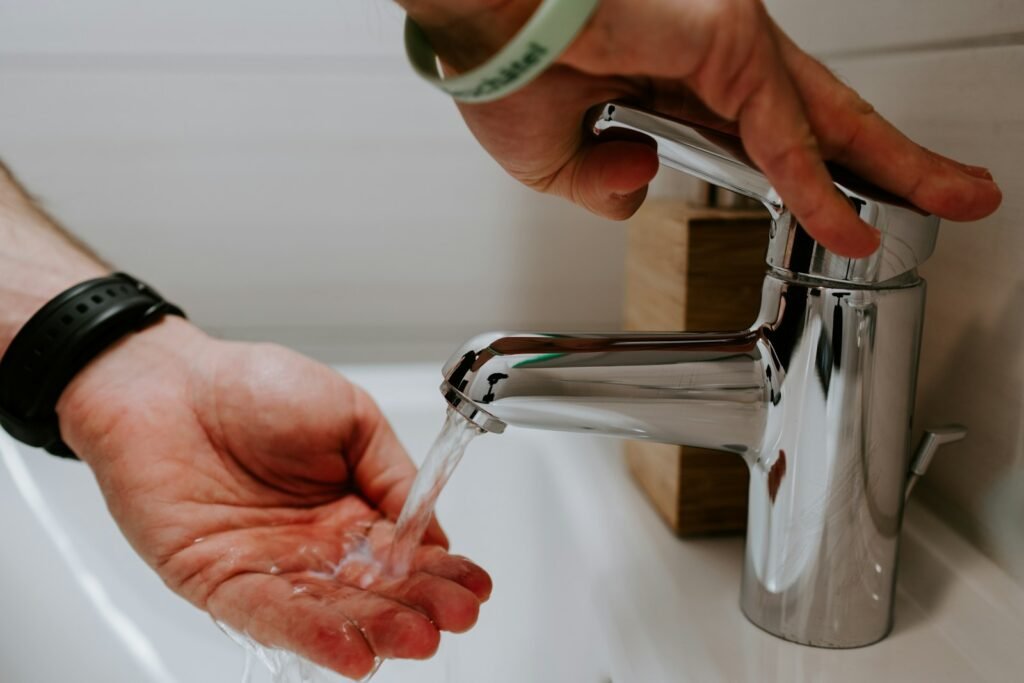
Testing the Faucet
Prepare yourself, dear readers, for the moment of truth has arrived Рthe grand finale, the pi̬ce de r̩sistance, the ultimate litmus test of your faucet installation prowess. Yes indeed, it is time to put those skills to the test in what we shall henceforth refer to as Testing the Faucet extravaganza!
But hold on just a second before you dive headfirst into this aquatic adventure. Let us heed the sage advice of Benjamin Franklin: “By failing to prepare, you are preparing to fail.” So let us meticulously inspect those connections, scour for any hints of leakage, and ensure that everything is snugger than a bug nestled in its rug. And should a leak rear its watery head, fear not – summon your inner MacGyver and tackle it like the DIY maestro you truly are.
Once all systems have been given their much-deserved green light, it is time for action! With a dramatic flair befitting such an occasion, turn that faucet on full blast and let victory’s liquid embrace flow forth. As success serenades your ears with every cascading drop akin to a triumphant waterfall dance, take a moment to revel in your handiwork. Bravo my friend! And always remember Helen Keller’s timeless words: “Alone we can do so little; together we can do so much.” So go ahead and give yourself a well-earned pat on the back as you stand tall in triumph knowing that no DIY challenge is too daunting for you.